Friday 28 February 2014

Back to Basics Scenery

Did a bit  of an experiment with Plastercine in an attempt to make a scenery mould.


The basic plastercine moulds. These  are  recreations because the old ones got squished...

Lookit those bubbles

This was a major dissapointment for me. I tried really, really hard to minimise how many bubbles would appear on these moulds and they have massive ones. You might notice on the plastercine picture above how those bubbles end up coming out on the models before smoothing. Bah! nevermind, they don't need to be perfect.

Woot!

On the other  hand, after the bubbles have been smoothed down and the air dough has dried, the things look pretty damn swish. Painted up, inked and with some very simple drybrushing they look pretty good IMO. Housemate did point out they were a little dark for a river so i might give it another whack with a lighter paint later on and see how it works, but i'm pretty happy.

I went with a straight line and a bendy line so that people can have bespoke rivers!

... Next, bridges!

Wednesday 26 February 2014

Back to Basics Wargaming

Remember when battle reports used to look like this?


I do. I used to love the old White Dwarf battle reports that had been set up in this way - When I was younger I was a massive Warhammer Fantasy Battles fan and the battle reports were allways the first thing I would look up whenever I cracked open a new magazine.

One of the things that allways bums me out when it comes to wargaming is that...  Well, imagination  will allways provide more ideas then the real world can provide for. If i want to have a platoon of sentient crystal golems invade the homelands of psychic hedgehog men... well, good luck getting the miniatures for that, right?

Except. Those little squares up above could be anything, couldn't they?

Yes. Yes they could.

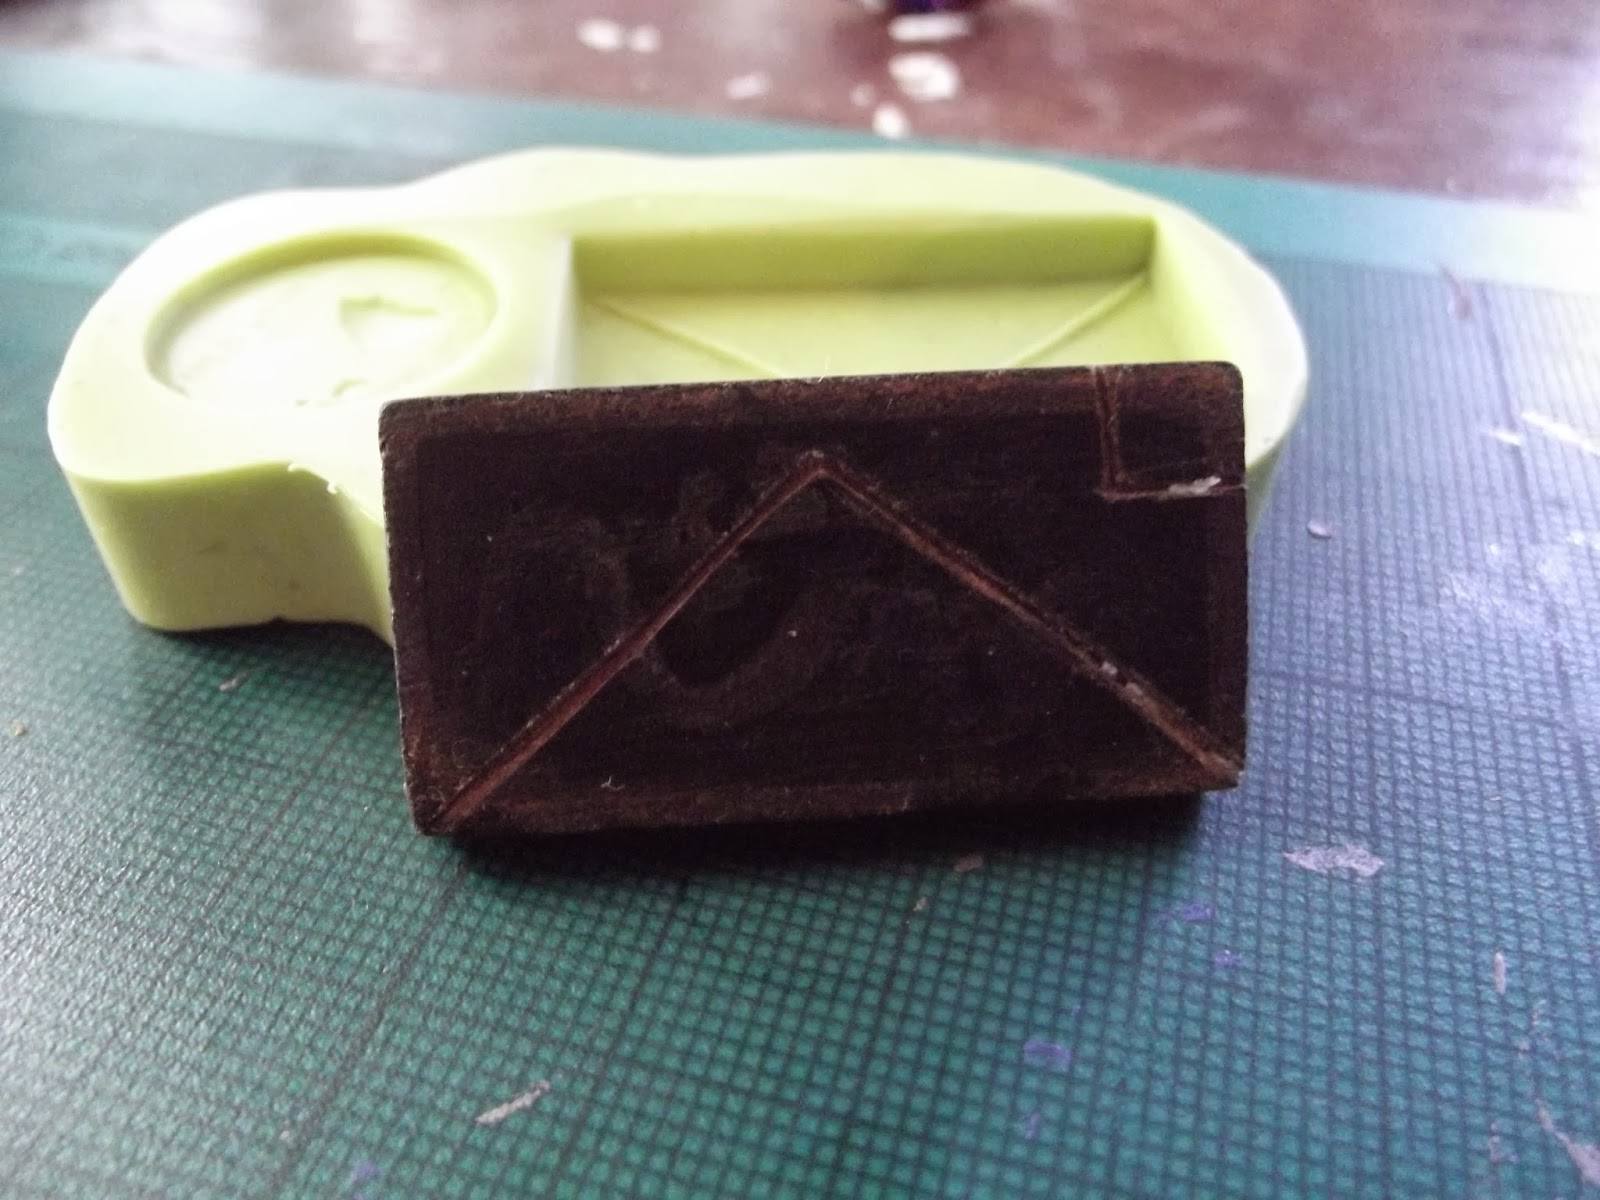
So began my first 'Big' moulding project. I broke out the Silli and a skull shaped cookie cutter to see how  well  it would come out. I sanded down an old Domino we had laying around for the basic rectangular shape and then applied my terribly shaky carving hand to it until I got a shape I was pleased with.
I then applied Silli and went to work. When I got back 6 hours later, the following was waiting for me.

Sucsess!


A slight amount  of bubbling around the top, but I wasn't planning to fill the thing to capacity anyway.

The moulds are actually pretty flexible.

It had worked pretty well. I took  a small amount of Air Dough and pressed it into the bottom of  the mould,  using the back of the Domino to press it down and get a good flat back to it.

Tada!

Obviously,  I was very chuffed with how clever I was. I then proceeded to print out 91 of the little buggers.

I decided to go with a very basic 'one colour and a white triangle' colour scheme, with the little rectangle in the corner being white as well to allow people to write numbers on them for book-keeping during game. I used Citadel paints because... well, I have a fucking ton of them around. I then used some Devlan Mud/Agarash Earthshade/Liquid Talent to get into the cracks, painted the white on and cleaned up the colouring.

The whole process

Personally, i'm really, really happy with them. Next stop... Scenery!

Friday 21 February 2014

Silli: My Other New Favourite Thing

So as I mentioned in last week's Fort Friday post, the Maid of Wynn brought some cheap and cheerful rubber moulding material into my peripheral vision. Its called Silli and while I havn't worked out all of the kinks in getting a perfectly un-bubbled mould out of the stuff I like to think i've managed OK so far.


As you can see from the picture, Silli is a two part mixture that doesnt set until its mixed together thoroughly in the same sort of way you might use Kneadite/Greenstuff or Milliput. The difference is that this stuff starts off goopy and sticky as all hell, can't be finely shaped and ends up with the consistancy of rubber once its been cured.

Maid of Wynn thinks that I should also mention that this stuff is silicon based and food grade as well, which means if you're a fan of cake decoration like she is you could have all sorts of fun with making edible warhammer miniatures to go on top of a cakey battlefeild...

(She doesnt realise however that she has now thrown down her own gauntlet and i'm going to force her to make her first FW post...)

You get a decent amount of the stuff when you get even the smalled pack and it seems to go way, way further then it looks like it will

And even after all this, I still had a bit of the green left over!

This is all from one 150g packet of Silli. I basically bought the smallest pack so that I could get used to moulding things for when i'm ready to move up to Resin Casting.  I might make a short detour into this re-usable re-meltable rubber stuff that was pointed out to me.

So yeah. I've tried it out a few times with varying levels of sucsess. Sometimes the moulds seem to bubble up and othertimes they don't. I guess practise makes perfect.

Wednesday 19 February 2014

Air Dough: My New Favourite Thing Ever

So for a while i've been looking to get into Resin Moulding. I have tons of ideas for stuff I want to make and play with and all sorts and the concept of getting into model making is really exciting for me. I went to my local model store to have a look one day with the Maid of Wynn and she pointed out to me that these guys were selling something called Silli (Which i'll make a post about next week...). I picked some up and then decided that really, I needed something to use as material for my practise moulds.

It was then that I discovered... Newclay Air Dough.

The little pot on the left was £3.00. The bag down behind it was £11 for 4 times the amount...

This stuff is pretty damn cool and pretty damn cheap. And for me, cheap is definately a deciding factor. (... I might make a GW negative post at some point out of frustration to explain...). Its a very light air-drying clay that would be exceptionally suitable for nursery schools (or Kindergartens for you americans out there)... As you might have told from the art on the front of the pot.

I played around with it for a while. You can mould it straight off and it dries in about 8 hours at room temperature. Theres a little warping, which is a shame but isnt too bad if you arn't expecting brilliance from something that costs £3 a tub.

Little car. Yes, its rubbish, but i'm not great with hand crafting yet...

Took two peices of air clay and mixed paint in with them. Sadly, i think mixing in the paint weakens the clay itself and causes those stretch-splits you can see there.

And a bunch of rocks. Yes, i'm aware one looks like a willy. Very adult of you

So yeah. I played around a lot with the potentials and limitations of the stuff. It dries almost like a weird paper mache pulp almost and is incredibly light. You can paint on it with Citadel Miniature Paints just fine and it holds the paint without a need for a Primer.

All in all, pretty good stuff.

Next, i'll cover my experiments with Silli and the awesome stuff i managed by combining the two in my craft projects...


Saturday 15 February 2014

Friday 14 February 2014

Slaine and Ukko: A breif history lesson, and some unpainted models...

Slaine Mac Roth. My first ever fantasy hero.


Slaine was a character from the comic book 2000AD, the comic that instilled my love of fantasy and sci-fi in my formative years. Slaine was a story based on celtic myth and drawing heavily from it for the plot as well as the author's original twist on the tales.

Armed with a massive axe named Brainbiter and one of the most badass catchphrases ever muttered, Slaine was installed firmly in my brain.

And then, The Responsible One bought me some models.

Wargame Foundry are the source! Take a look at The Responsible One's blog for more info

This will be a work in progress!

Valentines Day Special/Massacre

I decided to make my valentine's day card by hand.

You have to sing it to the tune of 'Bad Medicine'. Its an old meme for us but we like it ¬.¬

WAARRGGGLLLBRJFKJBSAKJBVKAHEBV

I <3 the Maid of Wynn

Wednesday 12 February 2014

Solstice Loot Blog and Unboxing

The Maid of Wynn (Love of my life, Apple of my Eye, My Moon and Stars...) bought me a bunch of Minis for The Solstice - I'd been going on about how big my bleeding Imperial Guard army was and how I wanted an army with models that are a bit more points-costy so that I can have a smaller army.

I decided on Necrons because why the hell not, right? I love the Egyptian aesthetic and I also love robots.

She bought me one of the Necron Battleforces as well as a Nightblade and a Command Barge.
I decided to do this post as one of the things that annoys me most about the 40k website (One. I have many) is that they don't actually show you what you're getting on the Sprue.

So here you lovely people are.

The Loot Pile

And then, I got distracted with a completely different unboxing project.


Heh.

Not so much necrons as omnomnomnomnomcrons

So, yeah. Back to the actual unboxing. First of all, we open up the Battleforce box - The necron battleforce contains 2 necron warrior squads, 1 necron immortals/deathmarks squad and one Ghost Ark or Doomsday Ark or whatever its called because I can't remember ATM.

The Box

Necron Warriors

Immortals/Deathmarks/Necron Bases/Gauss Rods

Spaaaaaaceeee Ghooooooooosst Ark.

Fairly simple stuff.

Next was the Command/Battle Barge. I'm actually pretty chuffed Amy got this one because I noticed that the Battleforce actually lacked a HQ choice, where the Battle Barge comes with a seperate Necron Overlord. Win.

Lots of peices considering the size of it...

And then of course the Necron Nightblade. Because AIRPLANES

I can't promise I wont make whooshing noises every time i move it...

And thats pretty much that. I later picked up a box of Canoptek Wraiths because the models are amazing and for use in Killteam... *Innocent Whistling*